
SLANTED PUFF STITCH TUTORIAL AND CHART

Round 13 of the Battle of the Stitches focused on using the Slanted Puff Stitch. This stitch is great for spring time as it has both the thickness of the puff stitches and the openness of the V-stitches that it uses.
When working this stitch, be sure to follow the written direction in the pattern you are working. A simple stitch placement change can make a difference in the look of the actual stitch. In this first photo, you can see the difference between working the V-stitches in the actual single crochet of the previous row compared to working the V-stitches in the ch-1 space of the previous row.

When working in the sc of the previous row, the stitch pattern is more secure/tighter than when working in the ch-1 space.
This next photo shows the difference when looking at the wrong side of the project.

Again, please be sure to follow the written instructions of the pattern you are working on and not just this tutorial as it may change the final outcome of your project. Some designers may choose to work in the ch-1 space and some may choose to work in the sc for various reasons.
Here are the basic instructions for working this stitch:
 |
| Chart used with permission from Crafting Friends Designs |
Stitches/abbreviations:
ch - chain
sp - space
sk - skip
st(s) - stitch(es)
yo - yarn over
sc - single crochet
dc - double crochet
V-stitch (V-st): (dc, ch 2, dc) in same stitch
Puff Stitch: [yo, insert hook around sc just made (front to back to front), pull up a loop)3x, yo, pull through all 7 loops on hook
Chain in multiples of 4+5
Row 1: Turn, dc in 5th ch from hook (counts as a V-st), sk next 3 sts, *V-st in next st, sk next 3 sts,* repeat from *to* across, (dc, ch 1, dc) in end st (counts as V-st)
Row 2: Turn, ch 1, sc in first dc, *ch 3, puff st around sc just made, ch 1, sc around ch of next V-st,* repeat from *to* across
Row 3: Turn, ch 4, dc in same sp as ch (counts as V-st), V-st in each sc across to end st, (dc, ch 1, dc) in end sc (counts as V-st)
Repeat rows 2-3
Below are photos showing stitch placement to help if needed
Photo 1 - The arrow in this photo is pointing to the yo and pull up a loop to finish the puff stitch


Photo 4 - [yo, insert hook around sc just made (front to back to front), pull up a loop)3x

Photo 2 - The arrow in this photo is pointing to the ch-1
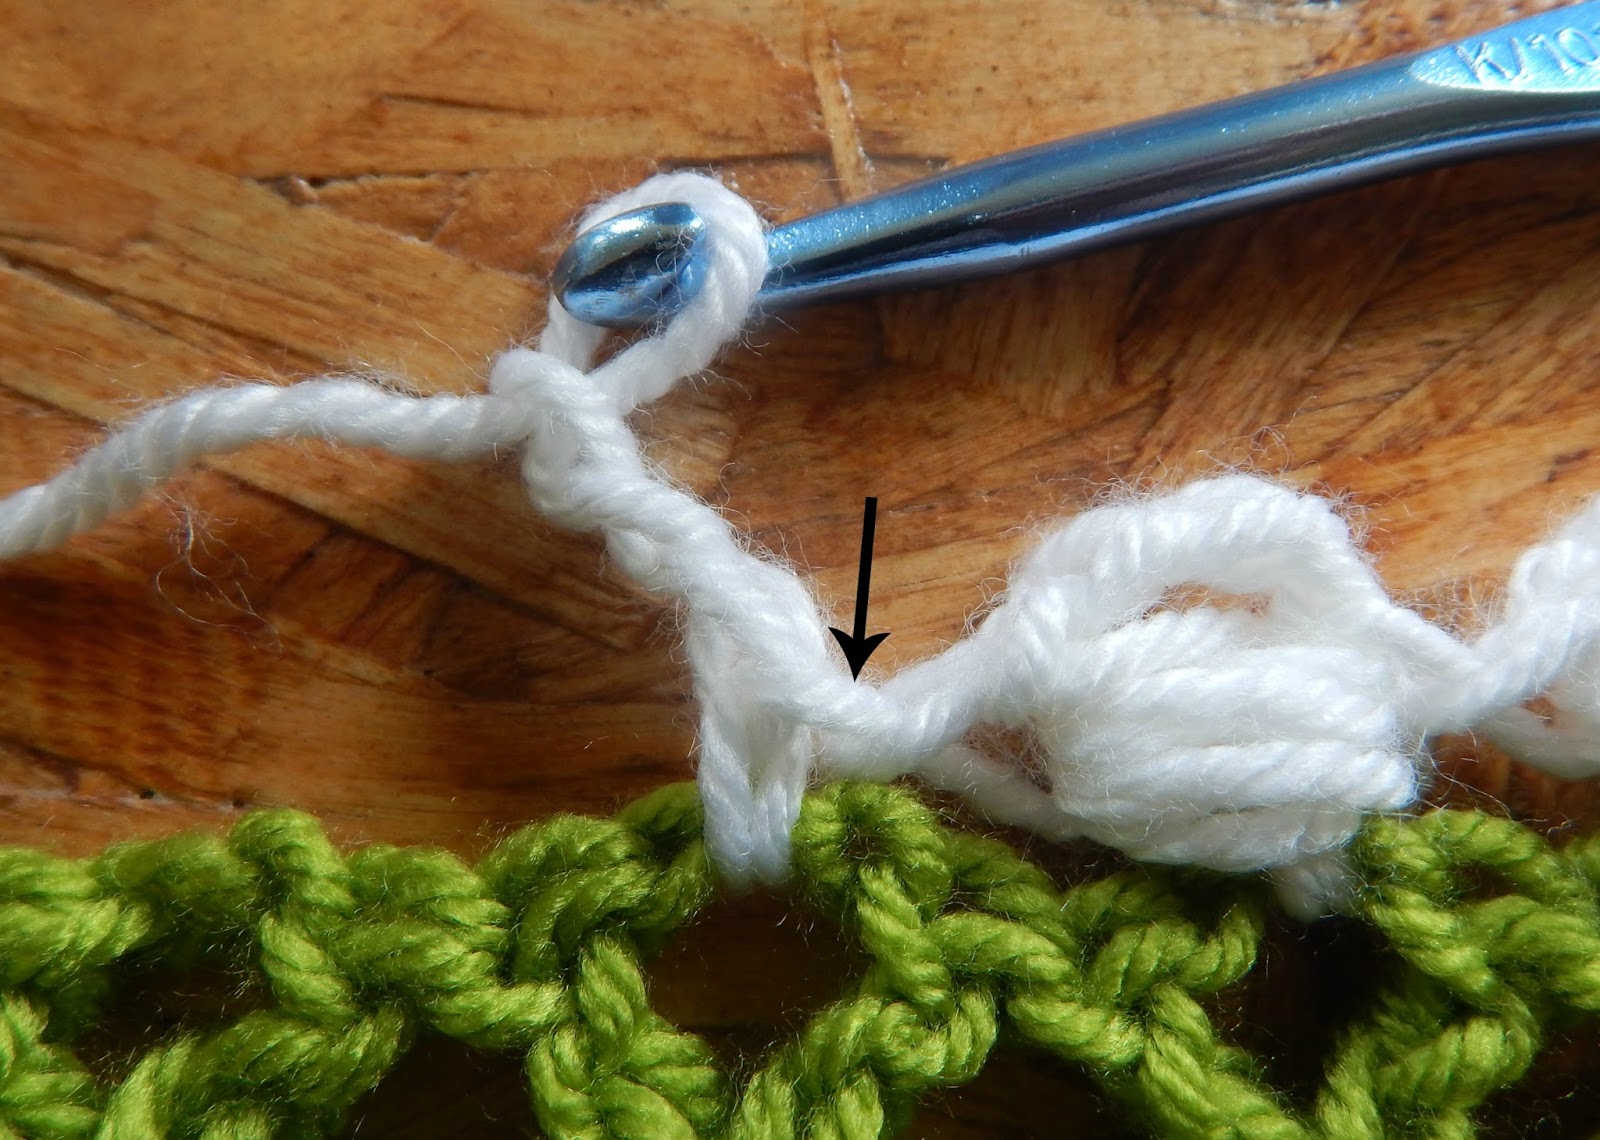
Photo 3 - The arrow in this photo is pointing to the top of the sc
(this is where you will work the V-st based on the chart instructions)


Photo 5 - yo, pull through all 7 loops on hook, ch 1

Photo 6 - V-st in top of next sc
note: it helps to push the puff stitch down on the sc in order to see the space you need to work in

Photo 7 - This is how it looks when working the V-st in top of sc

No comments:
Post a Comment